
Create blog posts with AI
We will guide you through entering topics, links, and images and proceeding to ‘글 구성 검토’ (review article composition), editing, and ‘내보내기’ (export).
Open this featureBefore you start
First, check the workspace where you will create the blog. Creating a new post currently costs 10 AI Credits, and another confirmation window will open before the actual deduction.
Link import is suitable for blogs, news, shopping malls, and YouTube addresses that can be opened externally. You can directly attach up to 12 images of PNG, JPG, JPEG, or WebP, up to 50MB per file.
Web search images may have unclear usage rights, so check the license before posting externally.
1. Open the ‘새 글 작성’ (Create a new post) screen
From the left menu, select ‘AI로 콘텐츠 제작’ (create content with AI) → ‘블로그 생성’ (create blog) and press ‘새 글 작성’ (create new post) in the upper right. In ‘생성기록’ (creation history), you can reopen in-progress or completed articles, and in ‘내 스타일’ (my style), you can manage the writing style created as a reference article.
Choose ‘글쓰기 방식’ (writing style): Basic, ‘전문적’ (professional), ‘친근한’ (friendly), ‘가벼운’ (light), ‘교육적’ (educational), and ‘설득적’ (persuasive). If there is a prepared ‘내 스타일’ (your style), that style will be applied instead of the default style.
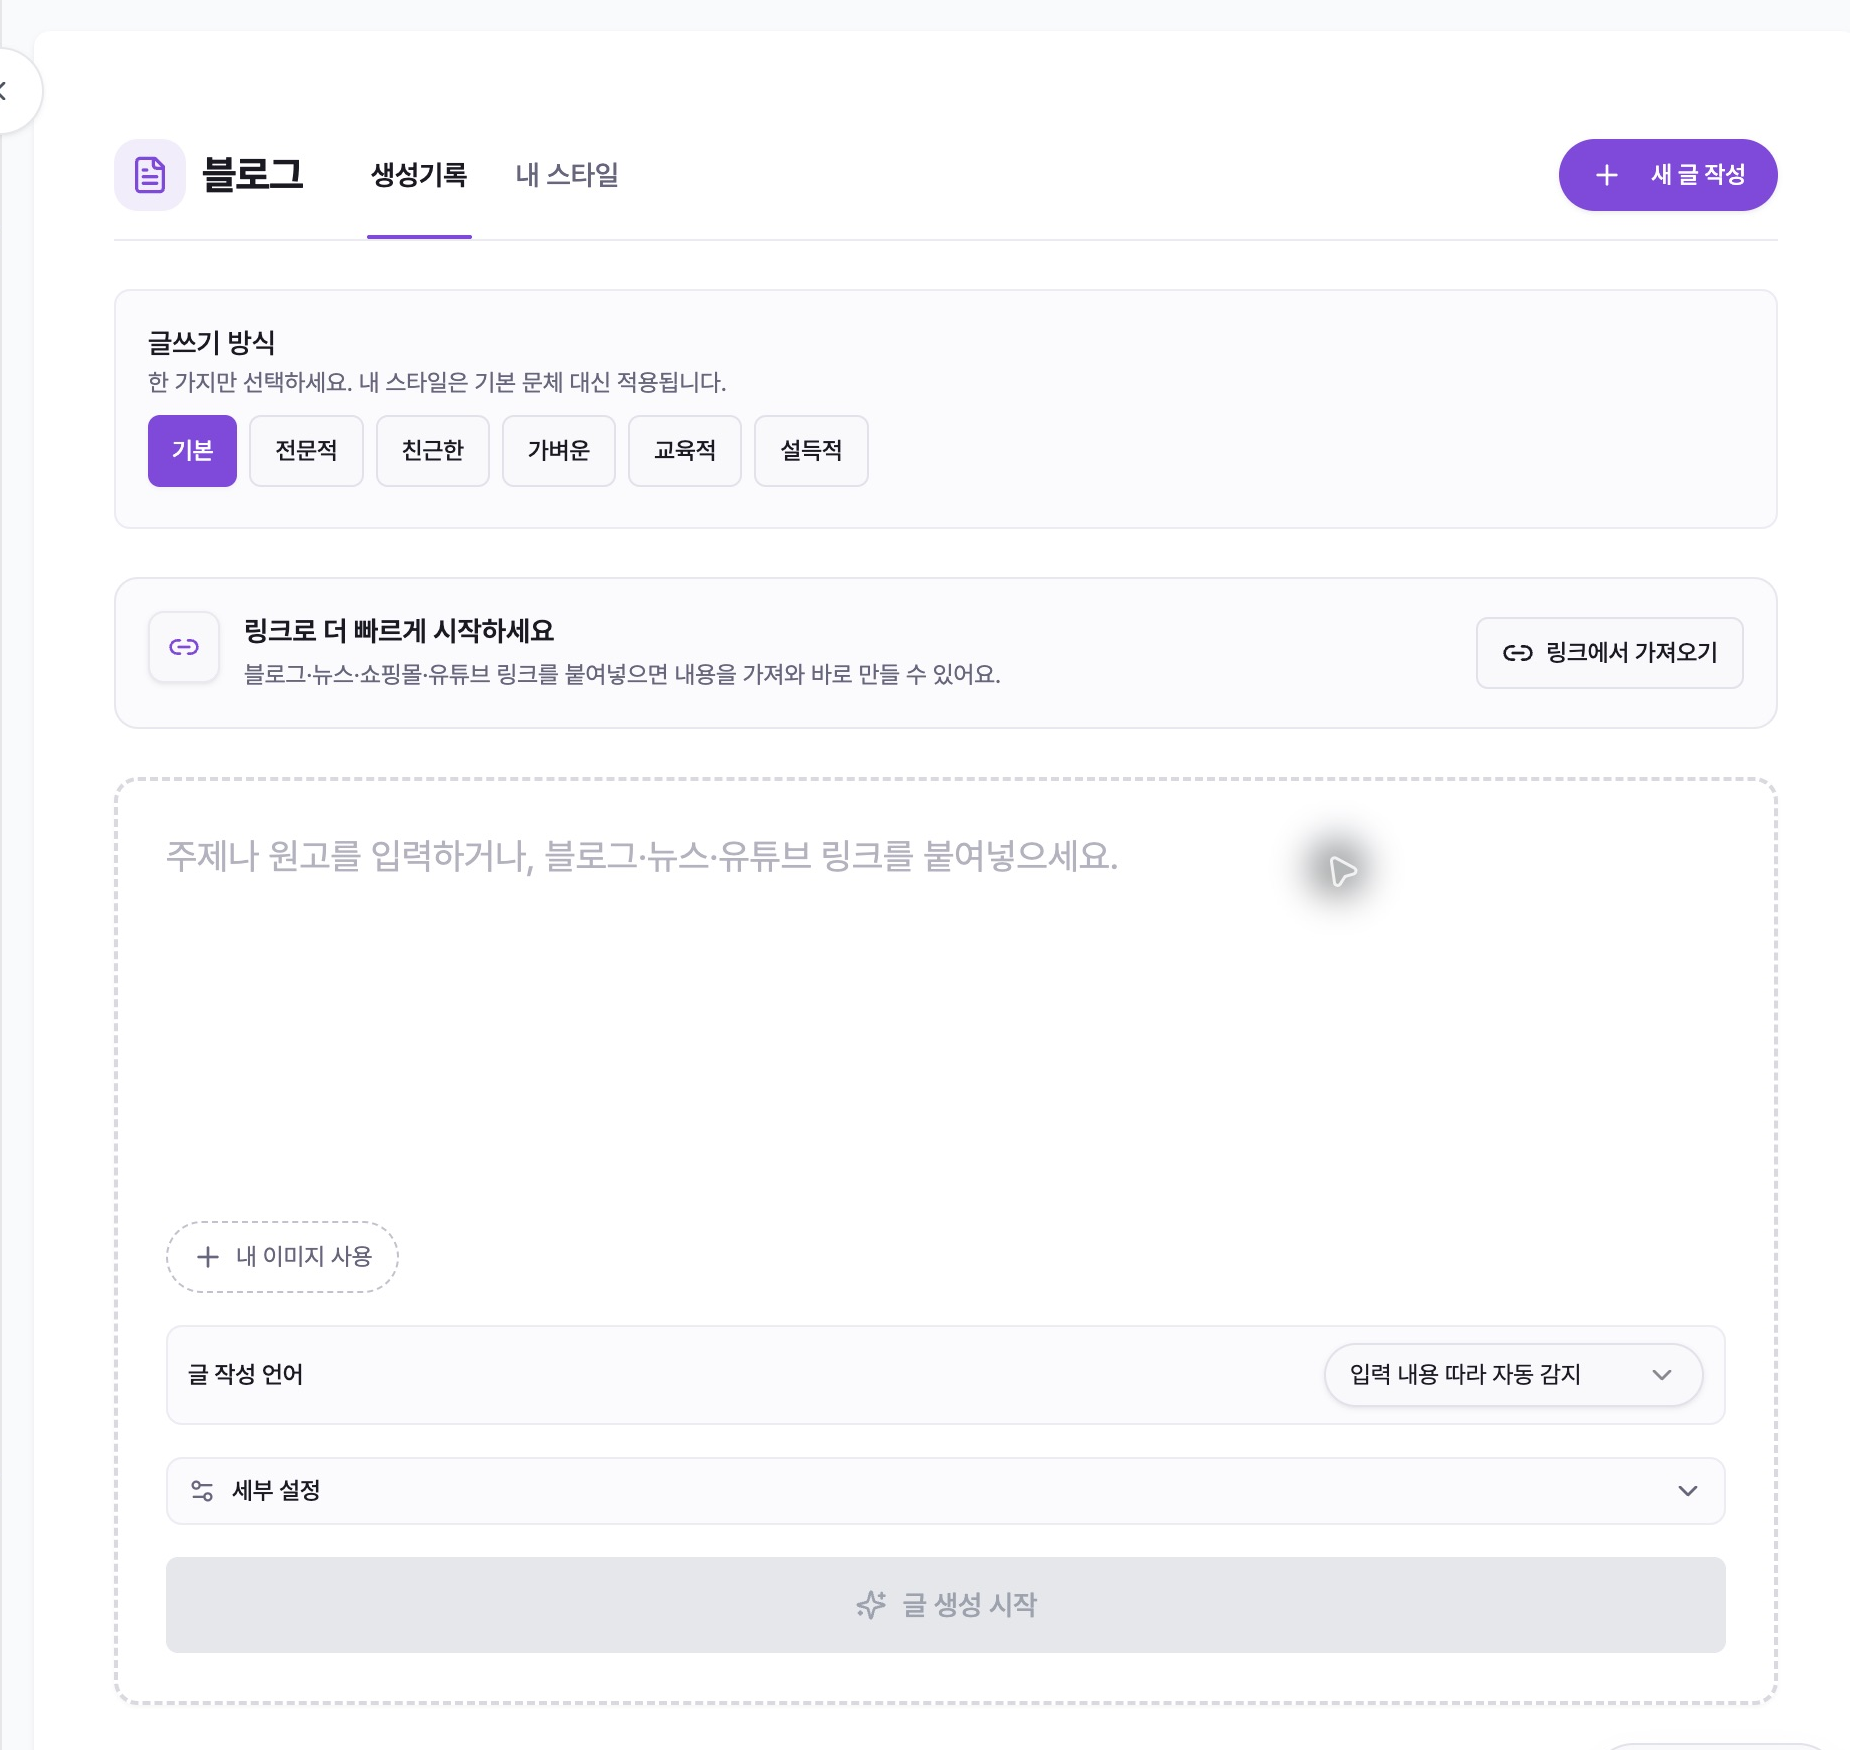
2. Enter topic/manuscript or link
Enter your topic or draft in the large text box. Rather than just writing down keywords, your intention will be clear if you write down ‘대상 독자’ (target audience), problem to be solved, and content to be included.
To build on existing material, click ‘링크에서 가져오기’ (Get from link), enter the address, and then press the arrow button. The imported text is filled in the input box, the original address is added to ‘참고 자료 링크’ (reference material link), and images on the page can be included as attachment candidates.
If the import fails, the addresses remain. Please check the address or paste the required text directly.
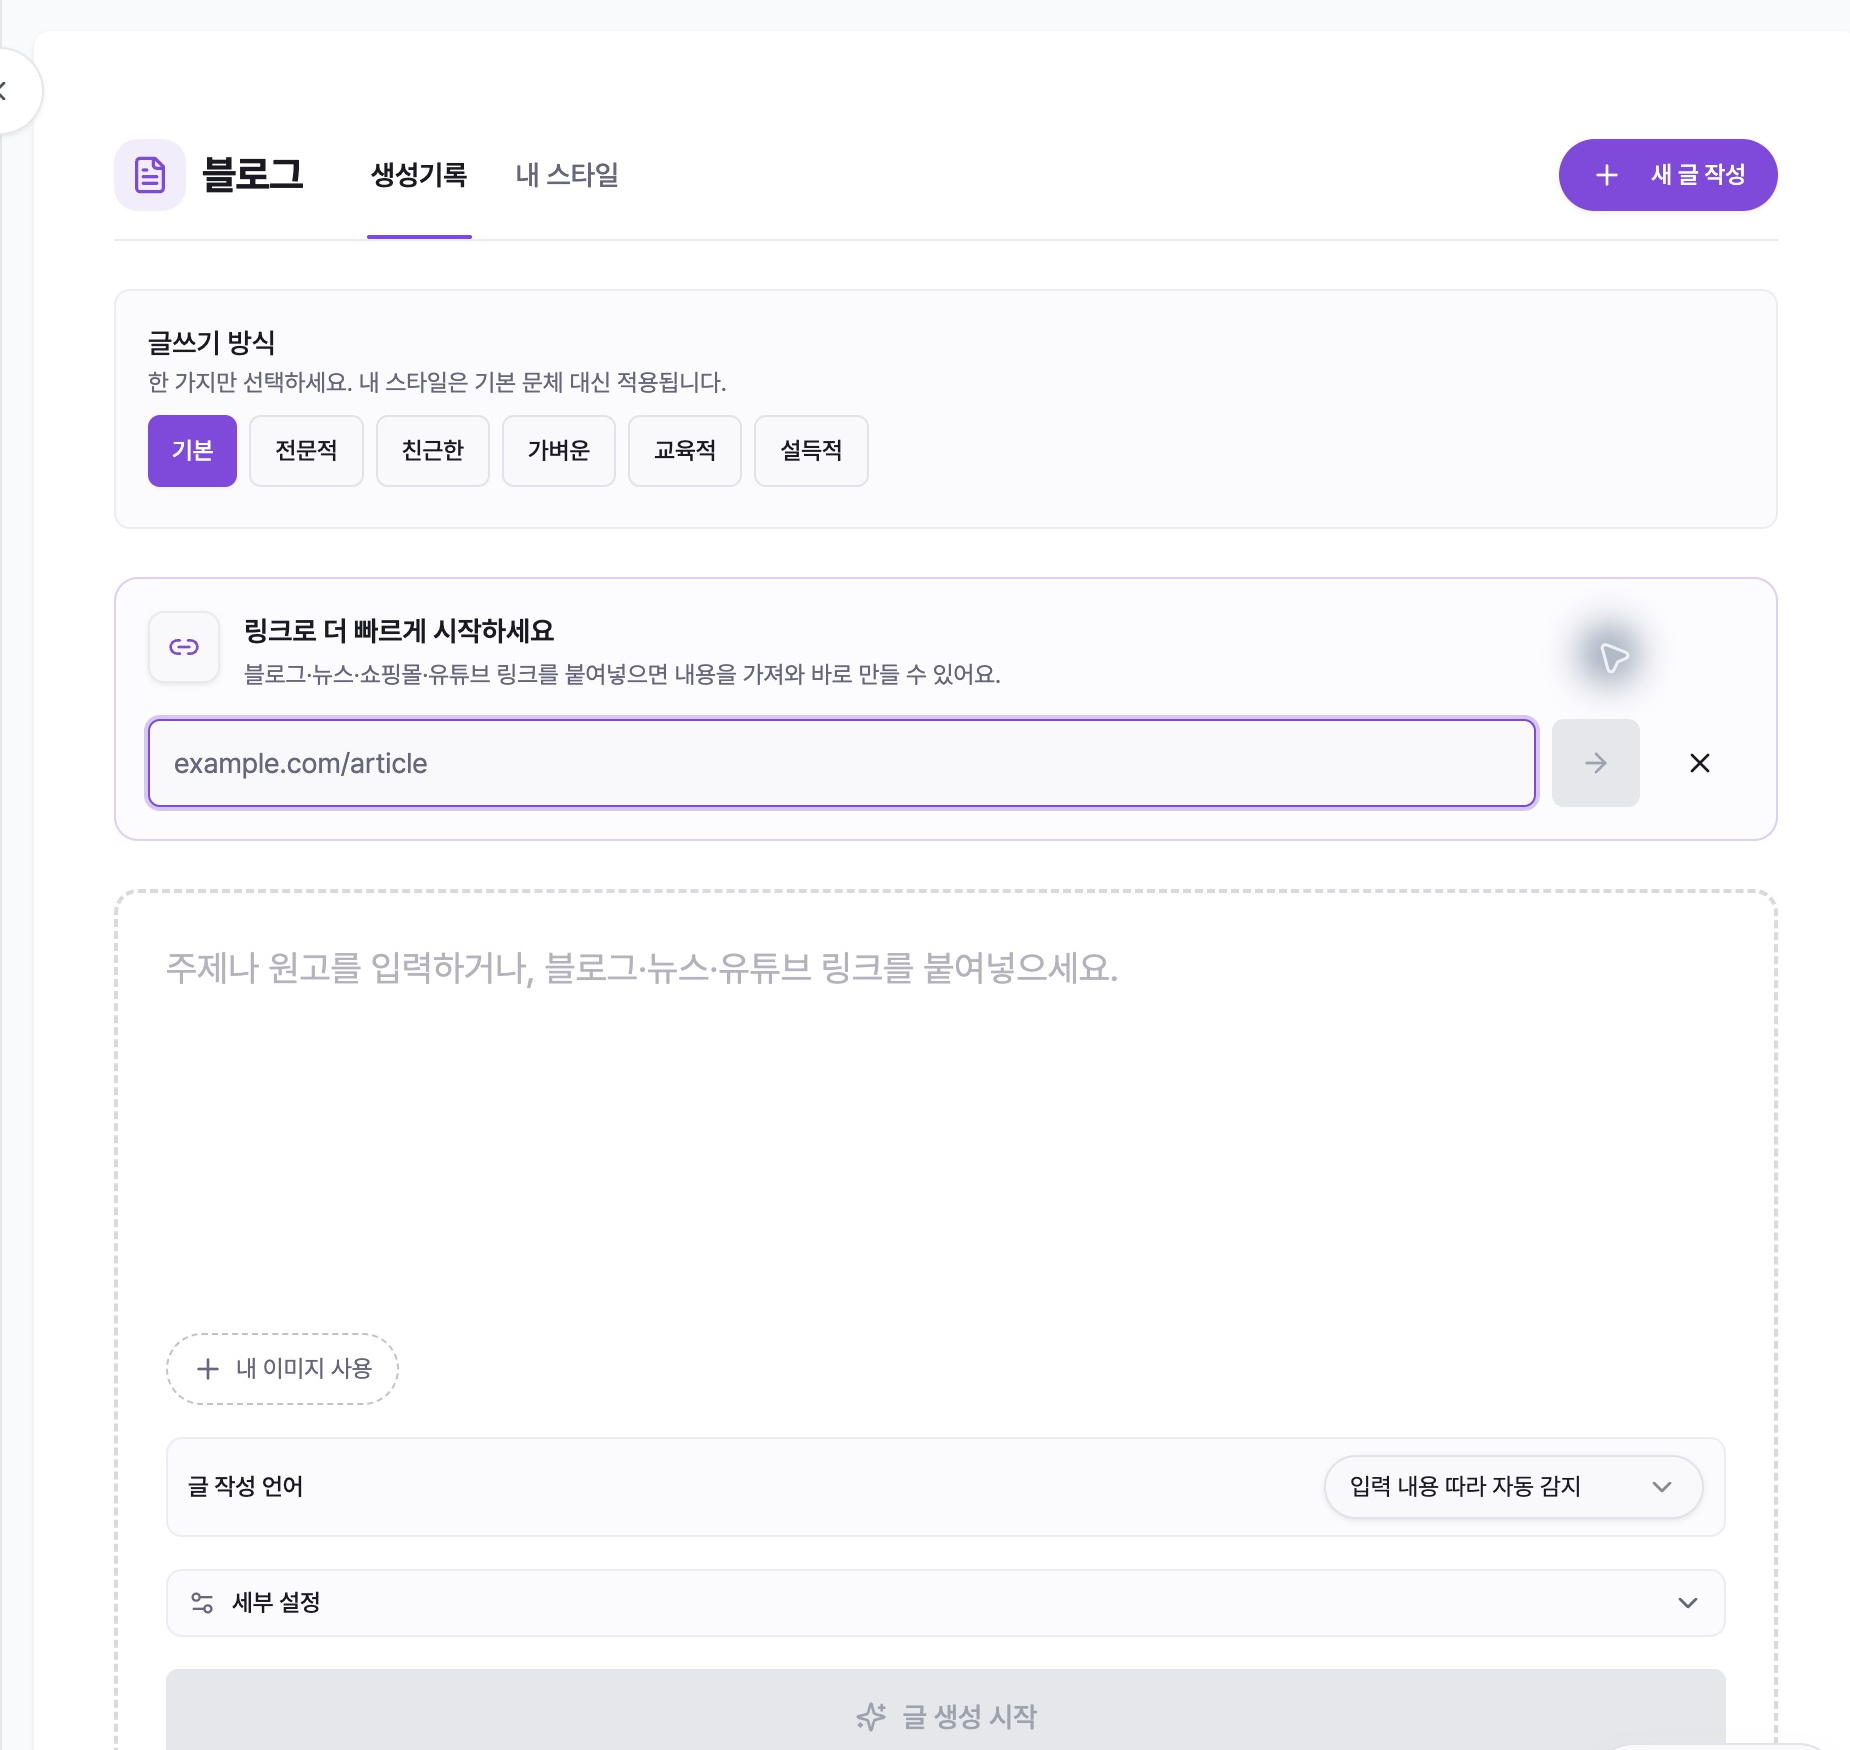
3. Decide on images and writing language
Attach an image by pressing ‘내 이미지 사용’ (Use my image) or dragging a file into the input area. The Create button will be temporarily disabled during upload.
The default value for ‘글 작성 언어’ (writing language) is ‘입력 내용 따라 자동 감지’ (automatically detects based on input). To lock the result language, please manually select one of the following: English, Japanese, Chinese, Spanish, French, German, Portuguese, Korean, or Arabic.
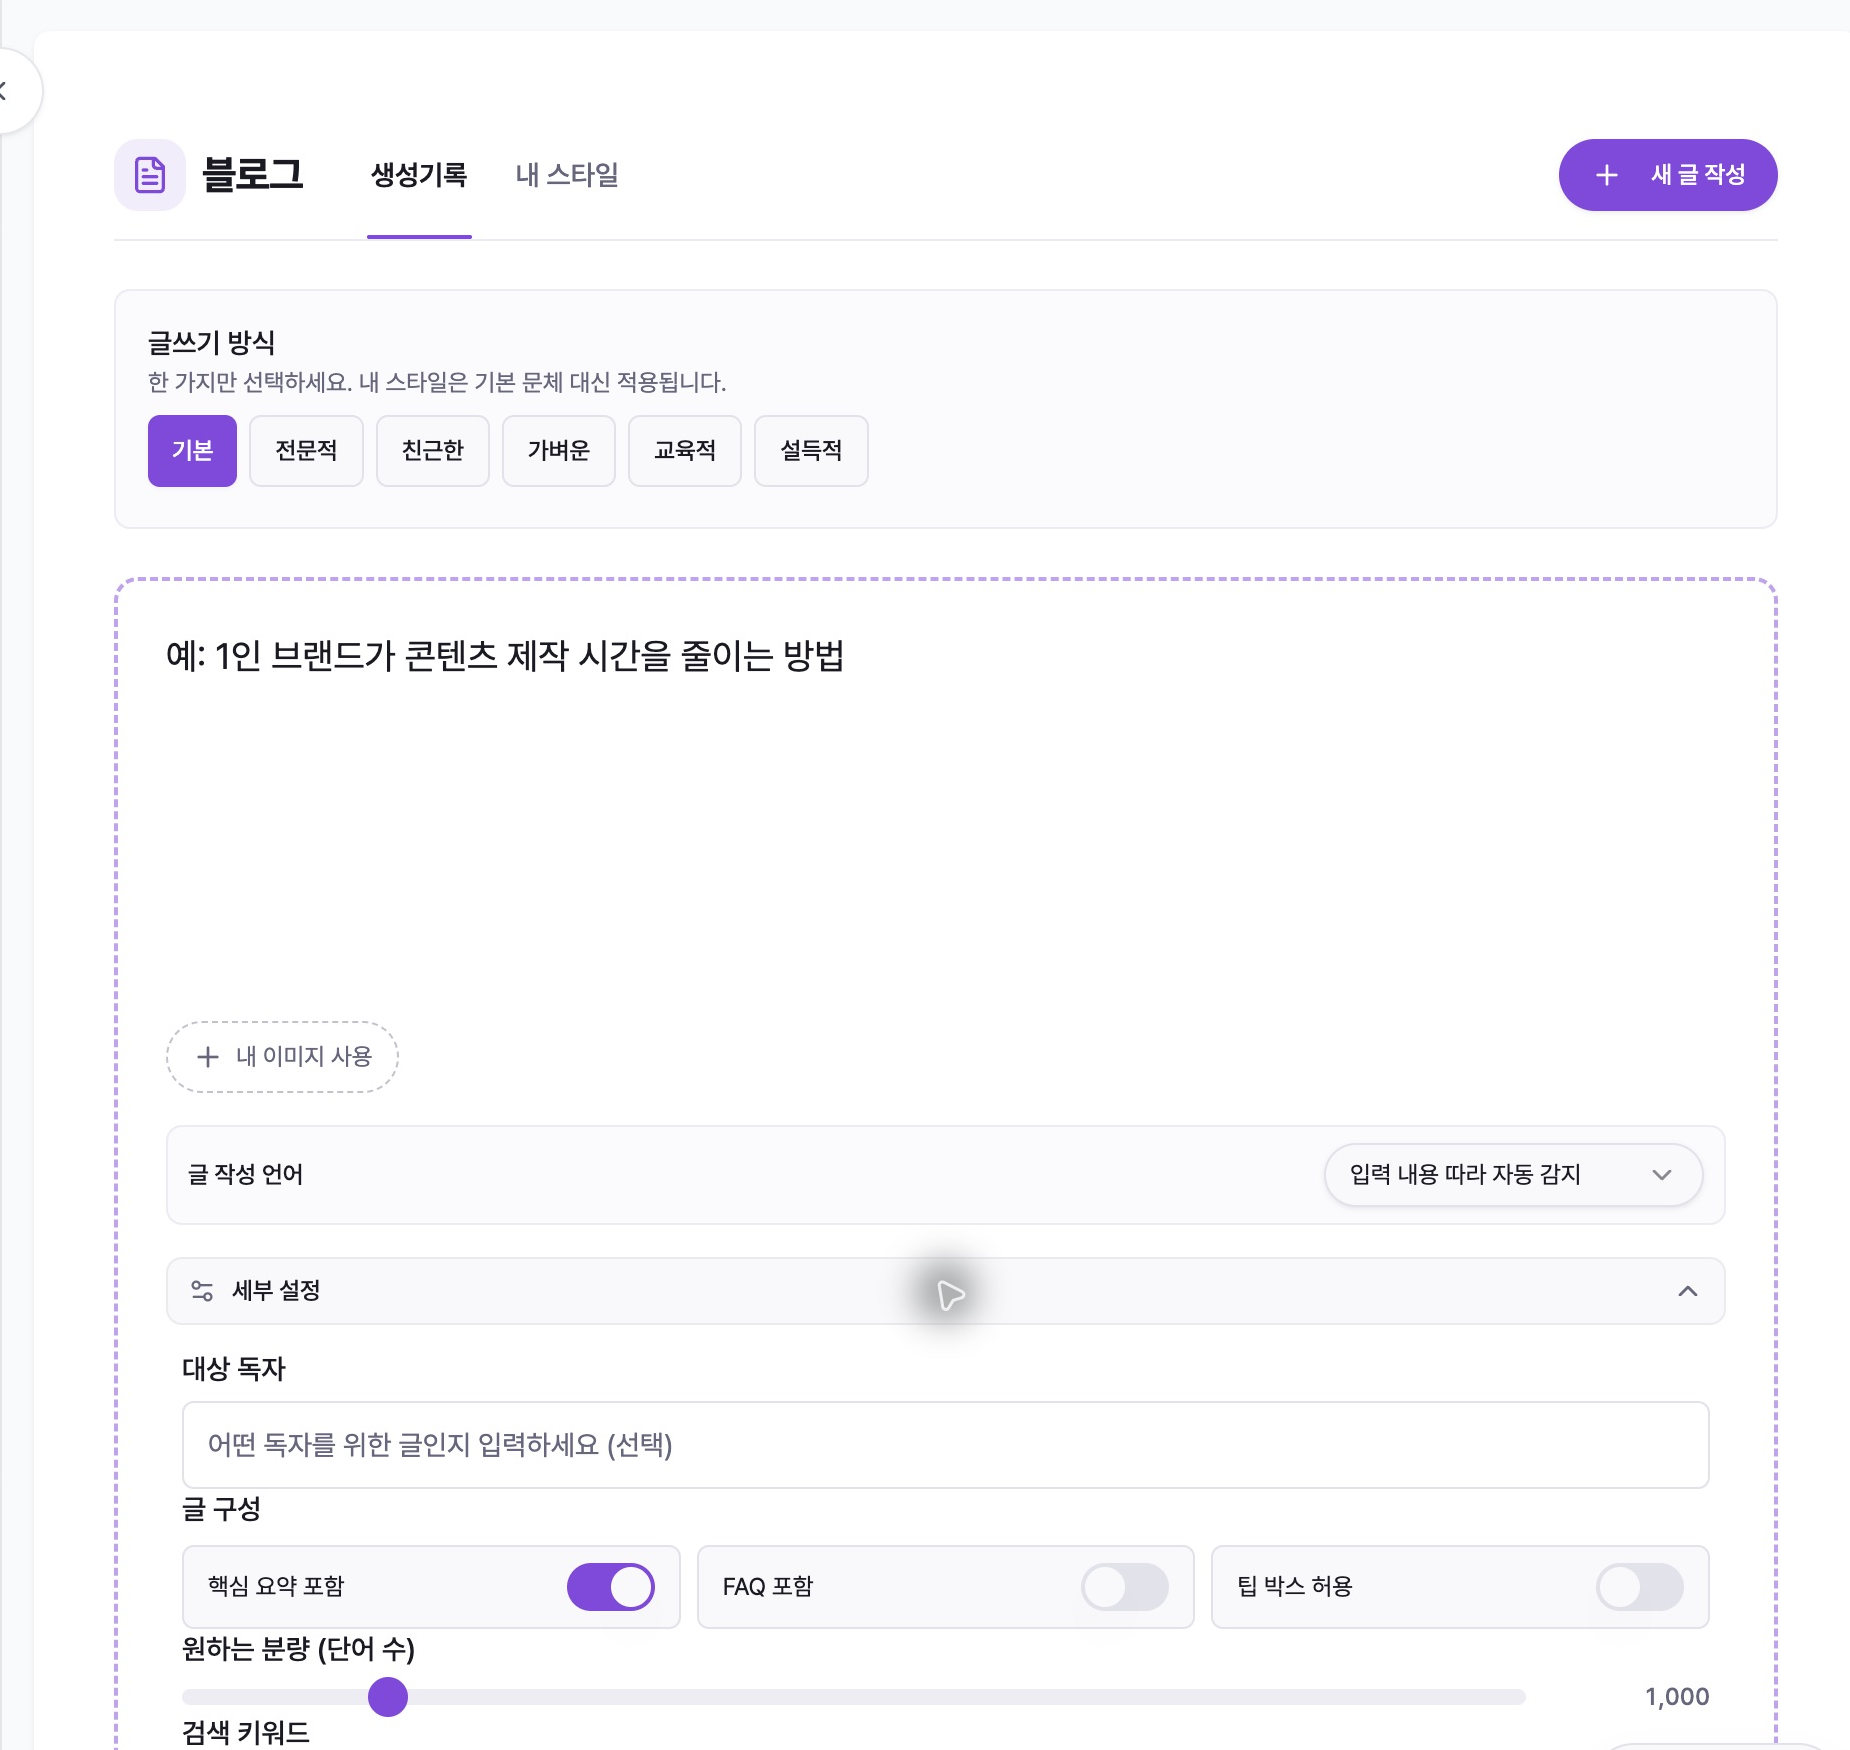
4. Refine ‘세부 설정’ (Detailed settings)
In ‘세부 설정’ (detailed settings), you can specify ‘대상 독자’ (target audience), whether to include key summary/FAQ/tip box, length of 500 to 4,000 words, up to 10 ‘검색 키워드’ (search keywords), and up to 3 ‘참고 자료 링크’ (links to reference materials).
In ‘추가 지시사항’ (additional instructions), write down the content that must be covered, expressions that must be avoided, and conditions for mentioning products and services. If necessary, enter the CTA text and link URL.
5. Create after checking image method and credits
Click ‘글 생성 시작’ (Start generating) and choose how to handle images. Without attachments, choose ‘관련 이미지 자동 검색’ (Automatically find relevant images) or ‘이미지 없이 글만 생성’ (Generate text only). With attachments, choose ‘첨부한 이미지만 사용’ (Use attached images only), ‘첨부 이미지 우선 + 자동 검색’ (Prioritize attachments and search automatically), or ‘이미지 없이 글만 생성’ (Generate text only).
Clicking ‘이대로 생성’ (Generate with these settings) opens the credit confirmation dialog. The current button reads ‘10 크레딧 사용하고 생성’ (Use 10 credits and generate). Generation starts only after you confirm this final step.
The progress indicator moves through research → outline → writing → search optimization. Work continues if you leave the screen, and you can reopen it from ‘생성기록’ (Generation history).
6. Check the composition of the article
When the status changes to ‘목차 확인 필요’ (Need to check table of contents), open the post and check the ‘글 구성 검토’ (Review post organization) screen. You can edit the post title, section title, section summary and sub-items and organize the structure by ‘섹션 추가’ (add section), ‘하위 항목 추가’ (add sub-item) and delete.
After checking the order of the reader's questions, duplication of content, and the ratio of information and product description, click ‘이대로 진행’ (Continue as is) to begin writing the text with the confirmed structure.
7. Editing the completed article
You can edit the title by clicking on it. ‘전체 편집’ (Edit All) opens the entire post in the editor and shows the saving... and auto-saved statuses. For individual sections, you can use Edit, ‘섹션 저장’ (Save section), ‘이 섹션 재생성’ (Recreate this section).
Section ‘이미지 추가’ (add image), replace, and delete is possible, and you can use the upload, search, my asset, and AI creation options provided. AI image creation may require separate credit verification.
‘전체 다시 쓰기’ (Rewrite all) keeps the outline and replaces the body, while ‘처음부터 재생성’ (Regenerate from scratch) restarts from research and the outline, replacing all existing content. Both actions currently show a 10-credit confirmation.
8. ‘내보내기’ (Export) and State Management
‘내보내기’ (Export) to ‘서식 포함 복사’ (Copy with Formatting) is a method to maintain title and paragraph formatting when pasting into Notion, WordPress, Google Docs, etc. ‘웹용 코드 복사’ (Code Copy for Web) copies clean HTML.
After copying, preview the heading levels, lists, links, images, and CTA in the destination editor. ‘편집 완료로 표시’ (Mark editing complete) only changes the status in Mirr; it does not publish to an external blog.
Use ‘초안으로 되돌리기’ (Revert to Draft) to rework your work, or ‘보관’ (Archive) to organize your work by hiding it from the list.
When a problem arises
If ‘글 생성 시작’ (start creating article) is disabled, check whether the topic/manuscript is not empty and whether link analysis or image upload has been completed.
If fetching the link fails, check whether the address can be opened externally and paste the contents of the page that requires login/subscription directly.
If image upload fails, check that it is PNG/JPG/JPEG/WebP, that each file is less than 50MB, and that the total number of images is not more than 12.
If the writing style is different from what you want, check the applied ‘글쓰기 방식’ (writing style) or ‘내 스타일’ (your style) and write down specific sentence length, tone, and prohibited expressions in ‘추가 지시사항’ (additional instructions).
In the ‘목차 확인 필요’ (Need to check table of contents) status, you must reopen the article and click ‘이대로 진행’ (Continue as is) to start writing the text.
If you see ‘이미지만 다시 처리’ (Reprocess image only) on the Image Step Failed screen, you can retry just the Image step without recreating the body.
If the copied formatting disappears, use ‘서식 포함 복사’ (Copy with Formatting) first, and if the target editor supports HTML, use ‘웹용 코드 복사’ (Copy Code for Web).