
Create and edit an AI video
The complete workflow for turning a topic, script, or link into a video, editing scenes, captions, and style, then downloading it.
Open this feature1. Check before you begin
Open “콘텐츠 제작” (Create content) → “비디오 생성” (Video creation) in the left menu and select “새 영상 만들기” (Create new video). A standard video currently costs 15 credits. AI scene images and AI video for selected scenes may add credits, so check the displayed total before starting.
You can upload PNG, JPG/JPEG, and WebP images plus MP4, M4V, MOV, and WebM videos, up to 30 files combined. GIF and APNG are not supported. Internet media does not automatically include usage rights, so verify the original license before commercial publishing.
2. Build a draft with automatic AI creation
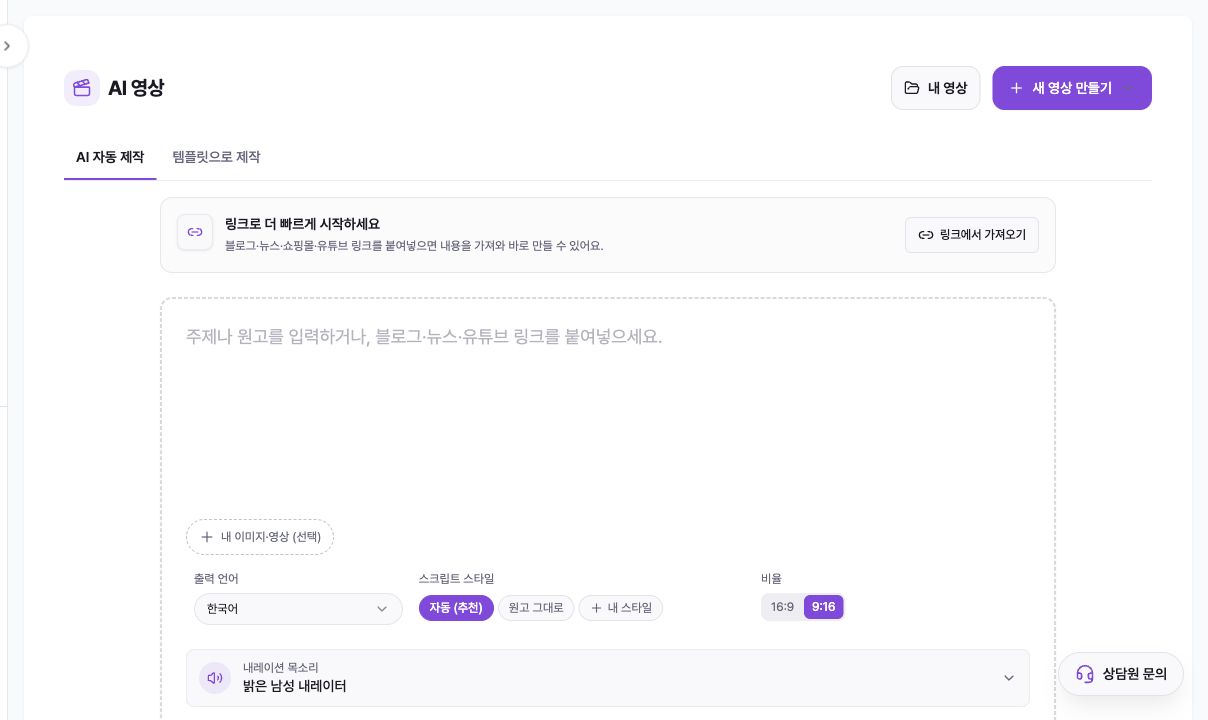
In “AI 자동 제작” (Automatic AI creation), enter a topic, finished script, or a blog, news, store, or YouTube link. Paste a link alone or use “링크에서 가져오기” (Import from link). Drag multiple files into “내 이미지·영상 (선택)” (My images and videos, optional), and AI assigns them to suitable scenes.
“출력 언어” (Output language) controls narration and captions. “자동 (추천)” (Automatic, recommended) rewrites the hook and wording, “원고 그대로” (Use script as is) preserves your sentences while arranging scenes and visuals, and “내 스타일” (My style) uses the hook, structure, and rhythm learned from a sample script.
Choose 9:16 for Reels, Shorts, and TikTok or 16:9 for YouTube-style video, then select a narration voice. “고급 옵션” (Advanced options) controls duration, background music, caption emphasis, web search, and whether to review the plan.
3. Create from a template
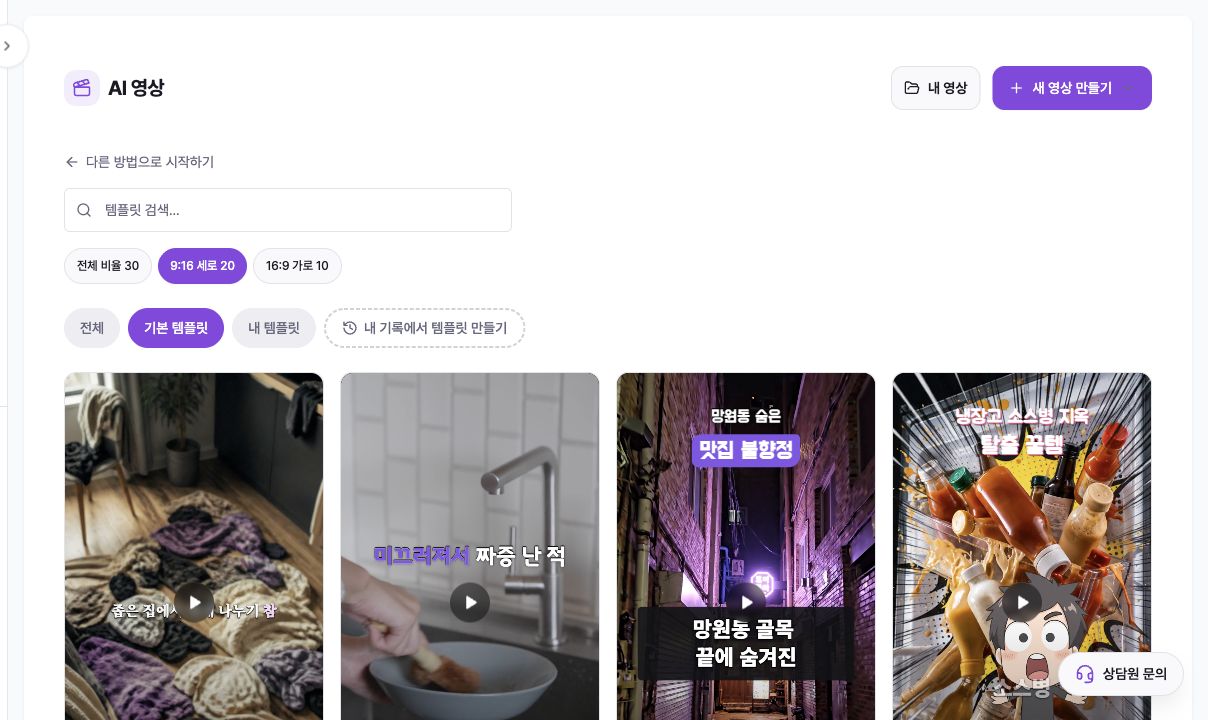
Choose “템플릿으로 제작” (Create from template) to reuse a proven structure and rhythm. Narrow the list with search, “전체 비율” (All ratios), 9:16, 16:9, and the “전체” (All), “기본 템플릿” (Default templates), and “내 템플릿” (My templates) tabs. Each card shows scene count, reference duration, and aspect ratio.
Use “내 기록에서 템플릿 만들기” (Create a template from my history) to reuse the scene structure and design of a past video. The card duration is a reference; the new script and voice speed can make the final video slightly shorter or longer.
4. Check production status and plan review
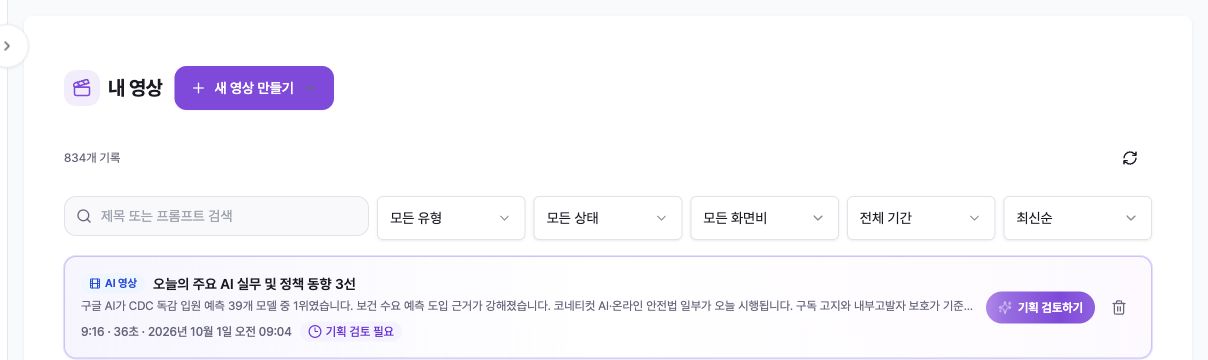
After creation starts, the job continues in the background. You may close the window and monitor progress in “내 영상” (My videos). “기획 검토 필요” (Plan review required) means the script and scene plan need approval, “영상 완성 전” (Before final video) means an editable draft is ready, and “완료” (Complete) means the video can be played and downloaded.
Combine search with video type, status, aspect ratio, production period, and sort filters. If a failure appears, check for a still-running job before repeating the same input. Deletion permanently removes edits and renders, so confirm the title in the confirmation dialog.
5. Edit scenes and on-screen elements
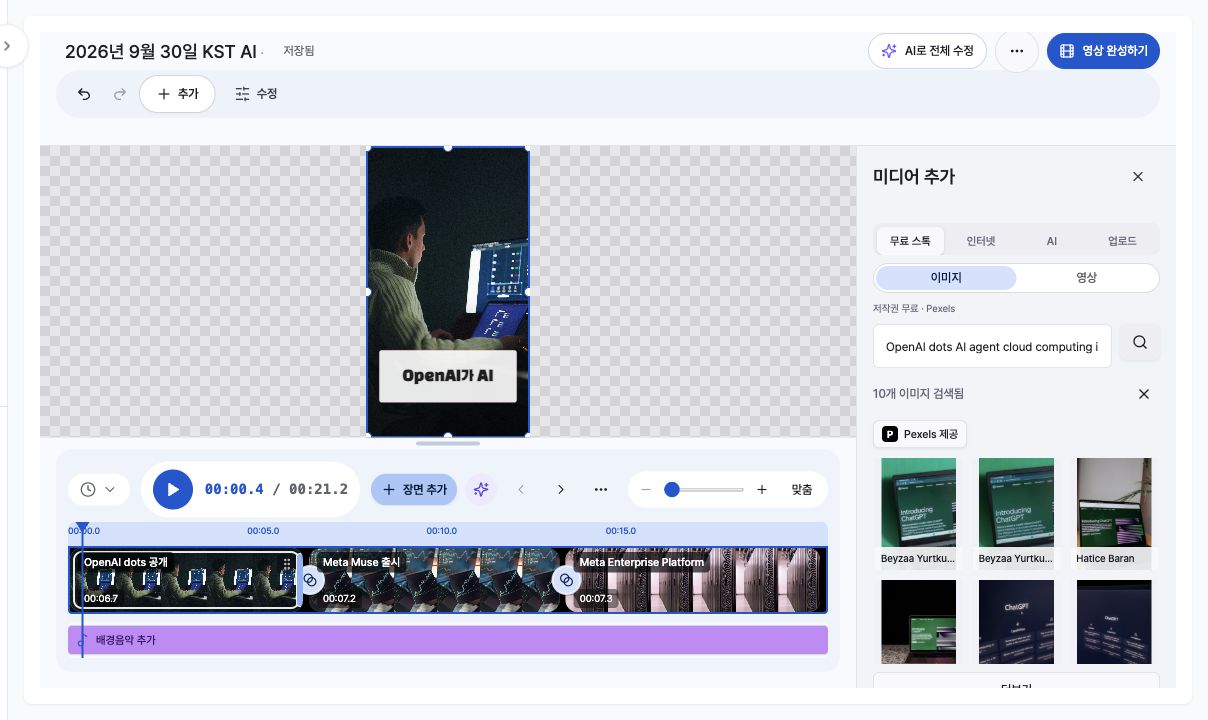
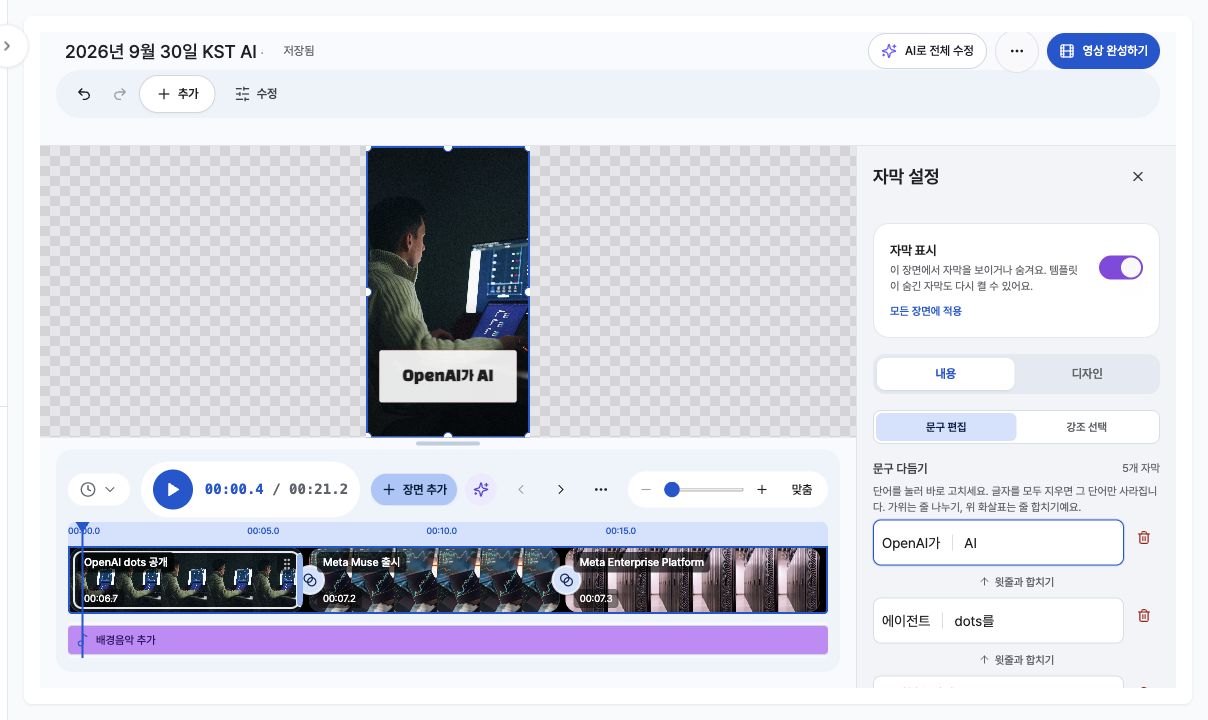
The editor has a central canvas, bottom timeline, and right panel. Select a scene in the timeline, then adjust its end time, order, and transition to the next scene.
“추가” (Add) contains new scene, media, text, graphics, background music, and sound effects. “수정” (Edit) opens scene settings, transitions, script and voice, captions, background music, and video style. Selecting an element on the canvas opens its layer settings. Confirm “저장됨” (Saved) after changes and use undo or redo around major edits.
When replacing media, choose “무료 스톡” (Free stock), “인터넷” (Internet), “AI”, or “업로드” (Upload). Stock media may not precisely represent a person, location, or product, so use your own source for scenes where brand products or real people matter.
6. Refine caption text and design
Open “수정” (Edit) → “자막” (Captions) to show or hide captions in the current scene or use “모든 장면에 적용” (Apply to all scenes). In “내용” (Content) → “문구 편집” (Edit text), edit words, split a line, or merge it with the line above. “강조 선택” (Choose emphasis) marks key words.
“디자인” (Design) controls position, preset, font, size, caption and emphasis colors, effects, and transitions. “이 디자인을 전체 영상에 적용” (Apply this design to the entire video) copies only the design; text, timing, and manual line breaks remain.
“타이밍 다시 맞추기” (Realign timing) regenerates captions from the voice and can overwrite manually edited text. “영상 자막 모두 제거” (Remove all video captions) affects every scene, so run either action only after reviewing its confirmation.
7. Finish and download
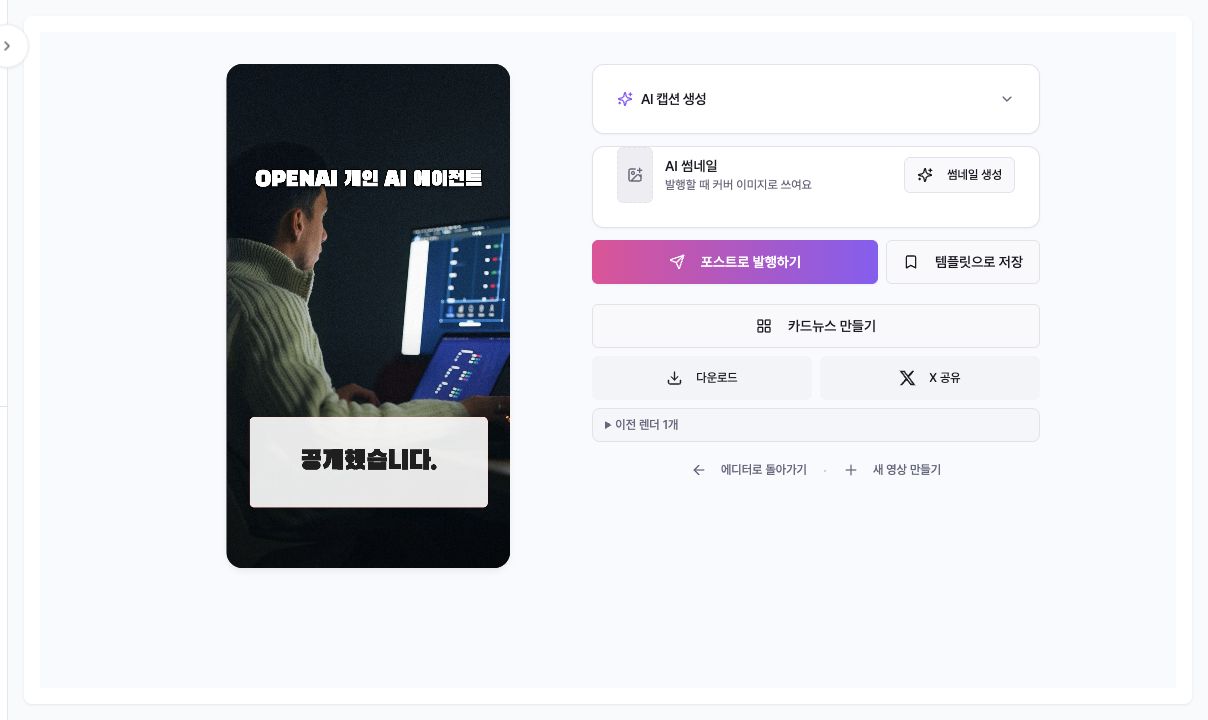
When editing is done, select “영상 완성하기” (Finish video). Rendering continues in the background. The MP4 is ready only after the completed video and “다운로드” (Download) appear on the result page.
The result page offers AI caption, AI thumbnail, “포스트로 발행하기” (Publish as a post), “템플릿으로 저장” (Save as template), “카드뉴스 만들기” (Create carousel), “다운로드” (Download), and “X 공유” (Share to X). For publishing, review the account, copy, and thumbnail on the separate post screen. Open “이전 렌더 n개” (n previous renders) to download an earlier output.
Troubleshooting
If “영상 만들기” (Create video) is disabled, make sure the input is not empty, link import or uploads have finished, and the ratio is supported. If files are missing, check the 30-file limit and supported formats; convert GIF or APNG to a still image or MP4.
If the script wording changes, choose “원고 그대로” (Use script as is) next time. If captions drift from the voice, finalize the script and voice first, then use “타이밍 다시 맞추기” (Realign timing), remembering that it can overwrite manual caption edits.
If no result appears, verify that “내 영상” (My videos) shows “완료” (Complete) and refresh. If it shows “영상 완성 전” (Before final video), return to the editor and select “영상 완성하기” (Finish video). If download fails, reopen the result and distinguish the current file from previous renders.