
[MCP setup] Connect ChatGPT and Claude to Mirr
Connect an AI app such as Claude to Mirr. Add the server address, sign in, and check your connected accounts.
Before you start
MCP connects your AI app to Mirr. You need a Mirr account and an AI app that supports MCP.
Open Mirr MCP settings and select MCP integration. Your Mirr plan must include MCP access.
1. Add the remote server
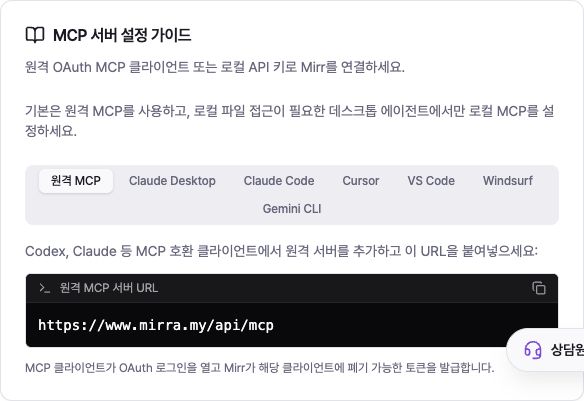
In your AI app settings, find Add MCP server or Add connector. Enter Mirr as the name and https://www.mirra.my/api/mcp as the server URL.
Start with remote MCP. It does not require creating an API key or editing a configuration file.
2. Connect in ChatGPT
Use ChatGPT on the web from your computer. The current official guide lists full MCP for Business and Enterprise/Edu, and read/fetch connections for Pro. Content creation and changes depend on your ChatGPT plan and workspace permissions.
Enable Settings → Apps → Advanced settings → Developer mode. Business requires an admin account; Enterprise/Edu may require administrator permission.
Open Settings → Apps → Create. Name the app Mirr, enter https://www.mirra.my/api/mcp as its MCP URL, and select OAuth authentication. Admins can also use Workspace settings → Apps → Create.
Select Scan Tools, complete the Mirr sign-in and connection, then select Create. In a new chat, choose Mirr from the tools menu or mention @Mirr.
Check the official ChatGPT setup guide for current menus and eligibility. If Create is missing, check that you are using the web version and have the required plan and permissions.
3. Connect in Claude
Open Claude Customize → Connectors, then + → Add custom connector. Enter Mirr as the name and https://www.mirra.my/api/mcp as the URL, then select Add.
Select Connect for Mirr and sign in to Mirr. In the chat, open + → Connectors and enable Mirr for that conversation.
Free supports one custom connector. Team and Enterprise require an organization Owner to add it first. Check the official Claude setup guide if the menus differ.
4. Sign in and check the connection
When Mirr opens a sign-in page, sign in to the Mirr account you want to use and follow the connection instructions.
Back in your AI app, ask “Show the social accounts connected to Mirr.” If your accounts appear, the connection is working. Start with a lookup: creating content may use Mirr credits.
5. Use local files if needed
Desktop AI apps can use local MCP when you need local file access. Create an API key in Mirr MCP settings, then select your app under MCP integration.
Examples are available for Claude Desktop, Claude Code, Cursor, VS Code, Windsurf, and Gemini CLI. Copy the example, replace your-api-key-here with your key, save, and restart the app. Keep your API key private.
If the connection fails
Server not found?
Check that the URL is exactly https://www.mirra.my/api/mcp. The Mirr homepage URL will not work.
Still disconnected after signing in?
Retry connecting in your AI app and check your Mirr account and plan. For local MCP, verify the API key and restart the app.